Adhesive Sticky-Back Stabilizer
A stabilizer with a peel-and-stick adhesive layer that secures items which cannot be placed in a traditional embroidery hoop, such as caps, socks, and patches.
As an Amazon Associate and affiliate partner, we may earn a small commission from qualifying purchases at no extra cost to you.
What Is Sticky Stabilizer Embroidery? The Hoopless Embroidery Solution
Anyone who has tried to embroider a thick bath towel, a stiff leather wallet, the curved brim of a baseball cap, or a tiny baby sock has run into the same wall before the machine even starts: how do you hoop something that does not fit in a hoop, or that gets crushed and marked the moment you clamp it down?
This is the exact problem that sticky stabilizer embroidery was designed to solve. Sold under names like peel and stick embroidery stabilizer, sticky embroidery paper, and sticky back embroidery stabilizer, this product flips the usual setup on its head. Instead of hooping the garment, you hoop only the stabilizer. Score the paper backing with a pin, peel away a section, and you are left with a tacky adhesive surface. Press your fabric or finished item directly onto that surface, and it stays put through the entire design, no hoop rings, no crushed nap, no fighting to squeeze a curved cap into a frame it was never built for.
Before going further, it helps to know that this product goes by a long list of names across different stores and brands: sticky stabilizer, sticky stabiliser (the UK spelling), sticky stabilizer embroidery, sticky embroidery stabilizer, sticky back stabilizer, sticky embroidery backing, embroidery sticky backing, adhesive stabilizer, and adhesive embroidery stabilizer. All of them describe the same core idea, a stabilizer with an adhesive layer that lets you hoop the stabilizer instead of the fabric.
If you searched for sticky stabilizer or sticky paper for embroidery because a project simply refused to cooperate with a normal hoop, this guide covers every type available, how to pick between them, and the small mistakes that cause the most frustration.
Perfect Projects for Sticky Stabilizer
- Napped fabrics such as velvet, corduroy, fleece, and terry cloth, where a hoop leaves permanent crush marks, also known as hoop burn
- Thick or stiff materials, including canvas bags, leather patches, and heavy denim
- Shirt collars and cuffs that are too narrow or curved to sit flat in a hoop
- Socks, baby clothing, and other small or oddly shaped pieces
- Backpacks, totes, and structured bags
- Baseball caps and other curved, pre-finished items
For deeply textured fabrics like towels, pairing sticky stabilizer with a water-soluble topping keeps the stitches sitting on top of the nap instead of sinking into it.
The 3 Types of Sticky Stabilizer (And When to Use Each One)
Not all adhesive backing for embroidery behaves the same way once stitching is finished. The three main categories below cover the vast majority of products you will come across.
Sticky Tear-Away Stabilizer (The Everyday Workhorse)
This is the type most embroiderers reach for first. It works like a standard tear-away stabilizer, with one side carrying an adhesive layer under a printed paper liner.
Hoop it paper side up, score and peel back the section covering your design area, then press your project onto the exposed adhesive. Stitch as normal, and once finished, tear the stabilizer away from the back the same way you would with any tear-away. The brands that dominate this category are OESD Stabil Stick (also labeled OESD Stabil Stick Tearaway), Floriani Perfect Stick (sold under names like Floriani Perfect Stick Stabilizer and Floriani Perfect Stick Tearaway Stabilizer), and Pellon Stick N Tear (also called Pellon Stick and Tear or Pellon Stick N Tear Stabilizer). If a pattern calls for perfect stick stabilizer or simply peel and stick stabilizer, it is almost always one of these three.
Sticky Cut-Away Stabilizer (For Stretch and Structure)
Tear-away strength is not enough for everything. Knit polos, performance fleece, stretchy activewear, and anything that needs permanent reinforcement call for a cut-away stabilizer instead, and the same peel and stick approach applies here too.
OESD Stabil Stick Cutaway, often searched as stabil stick cutaway, combines the hoopless convenience of sticky stabilizer with the lasting support a cutaway provides. This is the option to reach for when a project calls for self adhesive embroidery stabilizer or self adhesive stabilizer on fabric that is too stretchy or thin to hoop on its own. For very lightweight items, such as a t-shirt or a sheer knit, backing the cutaway with a layer of no-show mesh adds support without extra bulk.
Sticky Wash-Away Stabilizer (Fabri-Solvy and Filmoplast)
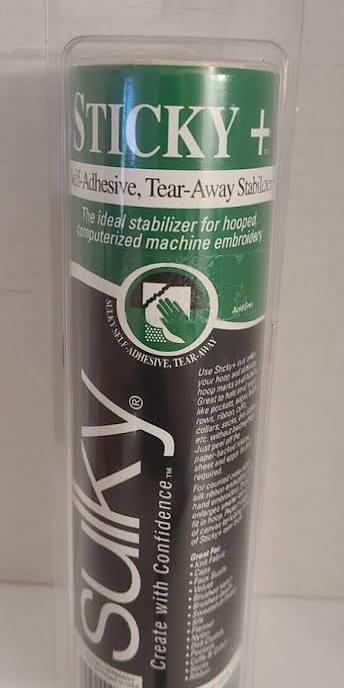
The third category works differently, and it is the one that confuses people who buy it expecting a typical hooped machine stabilizer. Sticky wash-away stabilizer, most famously Sulky Sticky Fabri-Solvy, is a printable, water-soluble sheet with a light adhesive backing.
You print or trace your design directly onto the fabri solvy paper, peel off the liner, and stick it onto the fabric as a stitching guide. Once stitching is complete, the entire stabilizer dissolves in water and leaves nothing behind. This product line appears under several names depending on where you shop, including sulky fabri solvy soluble stabilizer, sulky sticky stabilizer, sulky sticky back stabilizer, sulky sticky plus, and sulky sticky tear away stabilizer, and it is a popular pickup at craft stores, which is why sulky sticky fabri solvy hobby lobby is such a common search.
Filmoplast is the other name worth knowing here. Filmoplast stabilizer, also called filmoplast embroidery stabilizer or filmoplast sticky stabilizer, is a lightweight, sticky, wash-away product that has been an industry standard for delicate fabrics and hand embroidery for years. For a full breakdown of wash-away options and how they compare to cutaway and tearaway, see our wash-away stabilizer guide.
Sticky Stabilizer Comparison Chart
| Sticky Type | Best Fabric | Removal Method | Popular Brands |
|---|---|---|---|
| Sticky Tear-Away | Wovens, quilting cotton, medium-weight fabrics | Torn away by hand after stitching | OESD Stabil Stick, Floriani Perfect Stick, Pellon Stick N Tear |
| Sticky Cut-Away | Knits, stretch fabrics, activewear, caps | Trimmed close to the stitching, remains permanently | OESD Stabil Stick Cutaway |
| Sticky Wash-Away | Delicate fabrics, sheers, hand embroidery | Dissolves completely in water | Sulky Sticky Fabri-Solvy, Filmoplast |
Pro Tip: Stop Adhesive From Gumming Up Your NeedleThe number one complaint about adhesive stabilizer is not the stabilizer itself, it is what the glue does to your needle. Every pass through the sticky layer leaves a tiny bit of residue behind, and after a few hundred stitches that residue builds up enough to make the needle drag instead of pierce, which is when thread breaks start happening for no obvious reason.
Two habits fix this almost completely. Switch to a titanium-coated, non-stick needle for any project using sticky backing for embroidery, since the coating sheds adhesive far better than a standard chrome needle. Then keep a small dish with a few drops of rubbing alcohol near the machine and wipe the needle every 20 to 30 minutes of stitching on adhesive-heavy designs. The wipe takes seconds and prevents the slow needle drag that ruins an otherwise clean design.
Step-by-Step: How to Use Peel and Stick Stabilizer
- Hoop the stabilizer paper side up. Hoop the sticky stabilizer the same way you would hoop a standard stabilizer, with nothing else in the hoop yet.
- Score an “X” over the design area. Use a pin, seam ripper, or the tip of small scissors to lightly score the paper liner in a cross pattern, cutting only the paper and not the adhesive underneath.
- Peel back the scored sections. Fold back the four corners of paper to expose the tacky adhesive surface.
- Press your item onto the sticky surface. Lay the garment or item flat and press it onto the exposed adhesive, smoothing from the center outward to avoid air bubbles or shifting.
Common Mistakes
The most common mistake with sticky stabilizer is stretching the fabric tight while pressing it onto the adhesive, which feels secure at the time but causes the fabric to pucker and ripple once the stabilizer is removed and the fabric relaxes back into shape. A close second is using a standard sticky tear-away on delicate sheers, lace, or very lightweight fabrics, since the adhesive can be aggressive enough to pull threads or leave a residue that is hard to remove without damaging the material. Finally, many embroiderers skip the needle change altogether and run the whole project with a standard needle, only to start fighting thread breaks and skipped stitches halfway through as glue residue builds up and drags the needle through the fabric.
Frequently Asked Questions
What is sticky stabilizer used for in embroidery?
Will sticky stabilizer prevent hoop burn on velvet and corduroy?
Why does my needle gum up when using adhesive stabilizer?
Is Sulky Sticky Fabri-Solvy for hand embroidery or machine embroidery?
What is the difference between sticky tear-away and sticky cut-away stabilizer?
As an Amazon Associate and affiliate partner, we may earn a small commission from qualifying purchases at no extra cost to you.
Digitizer's Insight
Even the right stabilizer cannot fix a poorly digitized file. If you're still experiencing puckering, gaps, or registration issues after using the correct backing, the root cause is almost certainly your DST/EMB file — not your setup. Our team at EZ Stitch Digitizing specialises in precision pull-compensation and density correction.
Get Professional Digitizing →