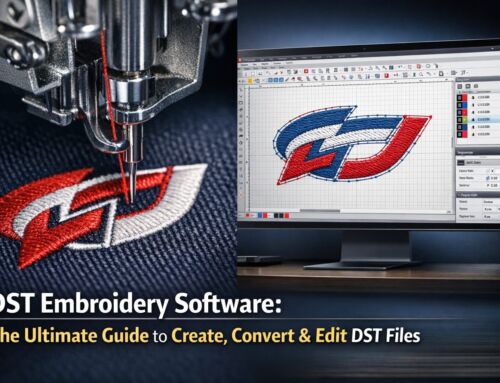
If you are looking for an AI to DST converter, you have likely realized that simply changing a file extension doesn’t work. In the world of commercial embroidery, an AI to DST embroidery file isn’t just a different format—it is a completely different language.
While an AI file speaks the language of mathematical curves (vectors), a DST file speaks the language of physical movement (needle hits). In this guide, we will explore the process to convert AI to DST file accurately, debunk the myths of “1-click” online tools, and show you how to get production-ready results.
1. What is an AI File vs. a DST File?
To understand AI to DST conversion, we must look at what is happening “under the hood.”
AI (Adobe Illustrator): This is a vector format. It uses points, lines, and curves to create a design. Because it is math-based, you can scale it to the size of a billboard or down to a business card without losing quality.
DST (Tajima): This is a “stitch” format. It contains zero math. Instead, it contains a list of coordinates. It tells the embroidery machine: “Move the hoop 2mm left, drop the needle, move 1mm right, drop the needle.”
Because these formats are so different, a simple AI to DST file conversion requires a human “translator” known as a digitizer. If you are starting with a simpler image format, you might first need to convert PNG to DST before jumping into complex vector art.
Adobe Illustrator (AI)
Vector Paths & MathTajima (DST)
Needle Commands & Stitches2. The Myth of the “AI to DST Converter Online Free“
If you search for an ai to dst converter online free, you will find dozens of websites promising instant results. However, professional embroidery shops almost never use them. Here is why:
The Problem with Auto-Digitizing
“Free” tools use auto-digitizing algorithms. They see a shape in your AI file and fill it with stitches in a straight line. They don’t account for:
Fabric Push and Pull: As thread is sewn, it pulls the fabric. Without “Pull Compensation,” your circles will look like ovals.
Stitch Density: Too many stitches will rip a hole in the shirt; too few will show the fabric through the design.
Thread Trims: Auto-converters often forget to tell the machine to cut the thread, leaving “jump wires” all over your logo.
This is why an EPS to DST embroidery file conversion—a format very similar to AI—often requires the same manual expertise to avoid production disasters.
3. How to Convert AI to DST File: Step-by-Step
If you want to do the ai file to dst transition the right way, follow this professional workflow:
Step 1: Clean Up the Vector Art
Open your design in Adobe Illustrator. Remove any gradients (embroidery can’t “print” a gradient easily) and simplify your paths. Convert all text to “Outlines.” A clean AI to DST embroidery starts with a clean vector.
Step 2: Import into Digitizing Software
You cannot use Illustrator to save a DST. You must import the AI file into professional software like Wilcom, Hatch, or Pulse. If you are using web-based vectors, you may be asking, is SVG a DST file? No, but SVG can be imported into these tools just like an AI file.
Step 3: Assign Stitch Types
The digitizer decides which parts of the AI design should be:
Satin Stitches: For borders and text.
Fill Stitches (Tatami): For large background areas.
Running Stitches: For fine details.
Step 4: Manage the Sequence and Colors
In AI, you have layers. In DST, you have a “Stop Sequence.” You must decide which color sews first. If you get the colors wrong in the file, you’ll need a guide to editing DST colors to fix it before production.
Step 5: Export and Verify
Save the file. Before you put it on a USB drive for your machine, use a Free Online DST Viewer to ensure the stitch paths are logical and there are no “bird nests” (clumps of thread).
4. Comparing AI to Other Embroidery Conversions
Not every project starts with a professional AI file. Depending on your client’s artwork, the process to convert ai to dst file might change:
| Original Format | Ease of Conversion | Best For… |
| AI / EPS | High (Cleanest) | Logos and Corporate Branding |
| Medium | Tech Packs. See: PDF to DST Guide | |
| JPEG / PNG | Low (Needs Trace) | Photos or hand-drawn art. See: JPEG to DST Guide |
5. Why Manual Digitizing is Essential for Leads & Quality
When businesses look for an ai to dst converter, they are usually looking for a shortcut. But in the garment industry, a bad file costs more than a good digitizer.
A professionally digitized AI to DST file ensures:
Machine Health: No needle breaks or “thread nesting.”
Production Speed: Efficient pathing means the machine finishes the garment 20% faster.
Visual Quality: Crisp edges and text that is actually readable.
For beginners, understanding the meaning and format of a DST file is the first step toward moving from “hobbyist” to “professional.”
Frequently Asked Questions (FAQs)
Professional Digitizing Services
If your DST embroidery file shows errors or production risks, we can help with:
Custom embroidery digitizing
DST file repair and optimization
Vector artwork conversion for embroidery
📧 Email: info@ezstitchdigitizing.com
📘 Facebook: EZ Stitch Digitizing
👉 Quote Form: Get a Professional Quote Today