Embroidery has been a beloved art form for centuries, but in the age of digital innovation, it has evolved into something even more exciting. Today, you can transform photos into beautiful stitched masterpieces — and even turn this craft into a profitable venture. If you’ve ever dreamed of starting a small printing business that blends creativity and technology, embroidery digitizing could be your perfect niche.
In this guide, I’ll walk you through the process of converting a simple picture into an embroidery-ready design, explain the tools you’ll need, and share insider tips to set you up for business success.
What is Photo Digitization for Embroidery?
Photo digitization for embroidery is the process of converting an image into a stitch file that an embroidery machine can read. Instead of manually tracing a design, you use digitizing software to map out the stitch patterns, textures, and colors directly from your image.
The key is to choose the right photo — high-contrast, clear images with distinct subjects deliver the best results. Think of it as reimagining a photograph through the textures of thread, using color and stitch direction to bring it to life.
Essential Tools & Materials You’ll Need
If you want to digitize photos — and especially if you plan to start a small printing business — having the right tools ensures quality results and efficient production.
Core Equipment
Embroidery Machine – Invest in a reliable, versatile machine that can handle multiple stitch types.
Digitizing Software – Choose software that specializes in photo embroidery conversion.
Scanner or High-Resolution Camera – Capture your image in crisp detail.
Computer – A capable computer for running your digitizing software smoothly.
Materials
Fabric – Cotton, linen, and canvas are durable, beginner-friendly options.
High-Quality Threads – Choose colors that match or enhance your photo.
Stabilizer – Keeps fabric taut and prevents puckering during stitching.
Embroidery Hoop – Essential for keeping your material firmly in place.
💡 Pro Tip for Beginners: Start with smaller projects to understand the digitizing process before offering your services commercially.
Preparing Your Photo for Digitization
A great embroidery starts with a well-prepared image.
Choose a High-Quality Photo – Clear, sharp, and well-lit images work best.
Enhance Contrast – Bold light-dark differences make details pop in stitches.
Simplify the Background – Busy scenes can be harder to translate into thread.
Resize for Your Project – Match image size to your intended embroidery dimensions.

Step-by-Step: How to Digitize a Photo for Embroidery
Import Your Image – Open your digitizing software and load your edited photo.
Trace Key Elements – Use built-in tools to map outlines and details.
Select Stitch Types – Fill stitches for large areas, satin stitches for smooth lines.
Match Colors – Either follow your image closely or adjust for better thread availability.
Preview & Adjust – Check for texture, stitch direction, and density issues.
Save & Export – Save in the format your machine reads, and transfer via USB or direct link.
Embroidering Your Digitized Design
Set Up Your Machine – Hoop the fabric with stabilizer, load the file, and thread the first color.
Monitor Progress – Keep an eye out for tension issues or thread breaks.
Switch Colors as Needed – Change threads according to your design sequence.
Finishing & Caring for Embroidered Pieces
Trim & Clean – Remove excess stabilizer and loose threads.
Press Gently – Use a pressing cloth to protect stitches from direct heat.
Store Carefully – Keep in a cool, dry place away from sunlight.
Turning Embroidery Digitizing into a Small Printing Business
If you’ve mastered photo-to-embroidery conversion, you’re sitting on a valuable skill that’s in high demand. From personalized apparel and caps to branded merchandise, businesses and individuals are eager to pay for unique, high-quality embroidery work.
Target Your Market – Small businesses, sports teams, fashion brands, and gift shops are top clients.
Offer Package Deals – Combine digitizing and embroidery services for better margins.
Leverage Social Media – Showcase before-and-after photos on platforms like Facebook and Instagram.
📩 Ready to bring your designs to life? Contact us at info@ezstitchdigitizing.com or message us on Facebook.
Frequently Asked Questions
1. What is the best software for photo-to-embroidery digitizing?
Specialized programs like Wilcom, Hatch, and Brother PE-Design are excellent choices. They offer advanced tools for tracing, color matching, and stitch optimization.
2. How long does it take to digitize a photo for embroidery?
For beginners, it may take 1–2 hours. Experienced digitizers can complete simpler designs in under 30 minutes.
3. Can I start a small printing business from home?
Yes! With the right equipment and marketing strategy, many embroidery entrepreneurs operate successfully from home.
4. What fabrics are best for photo embroidery?
Cotton, linen, and polyester blends are great for beginners due to their stability and durability during stitching.
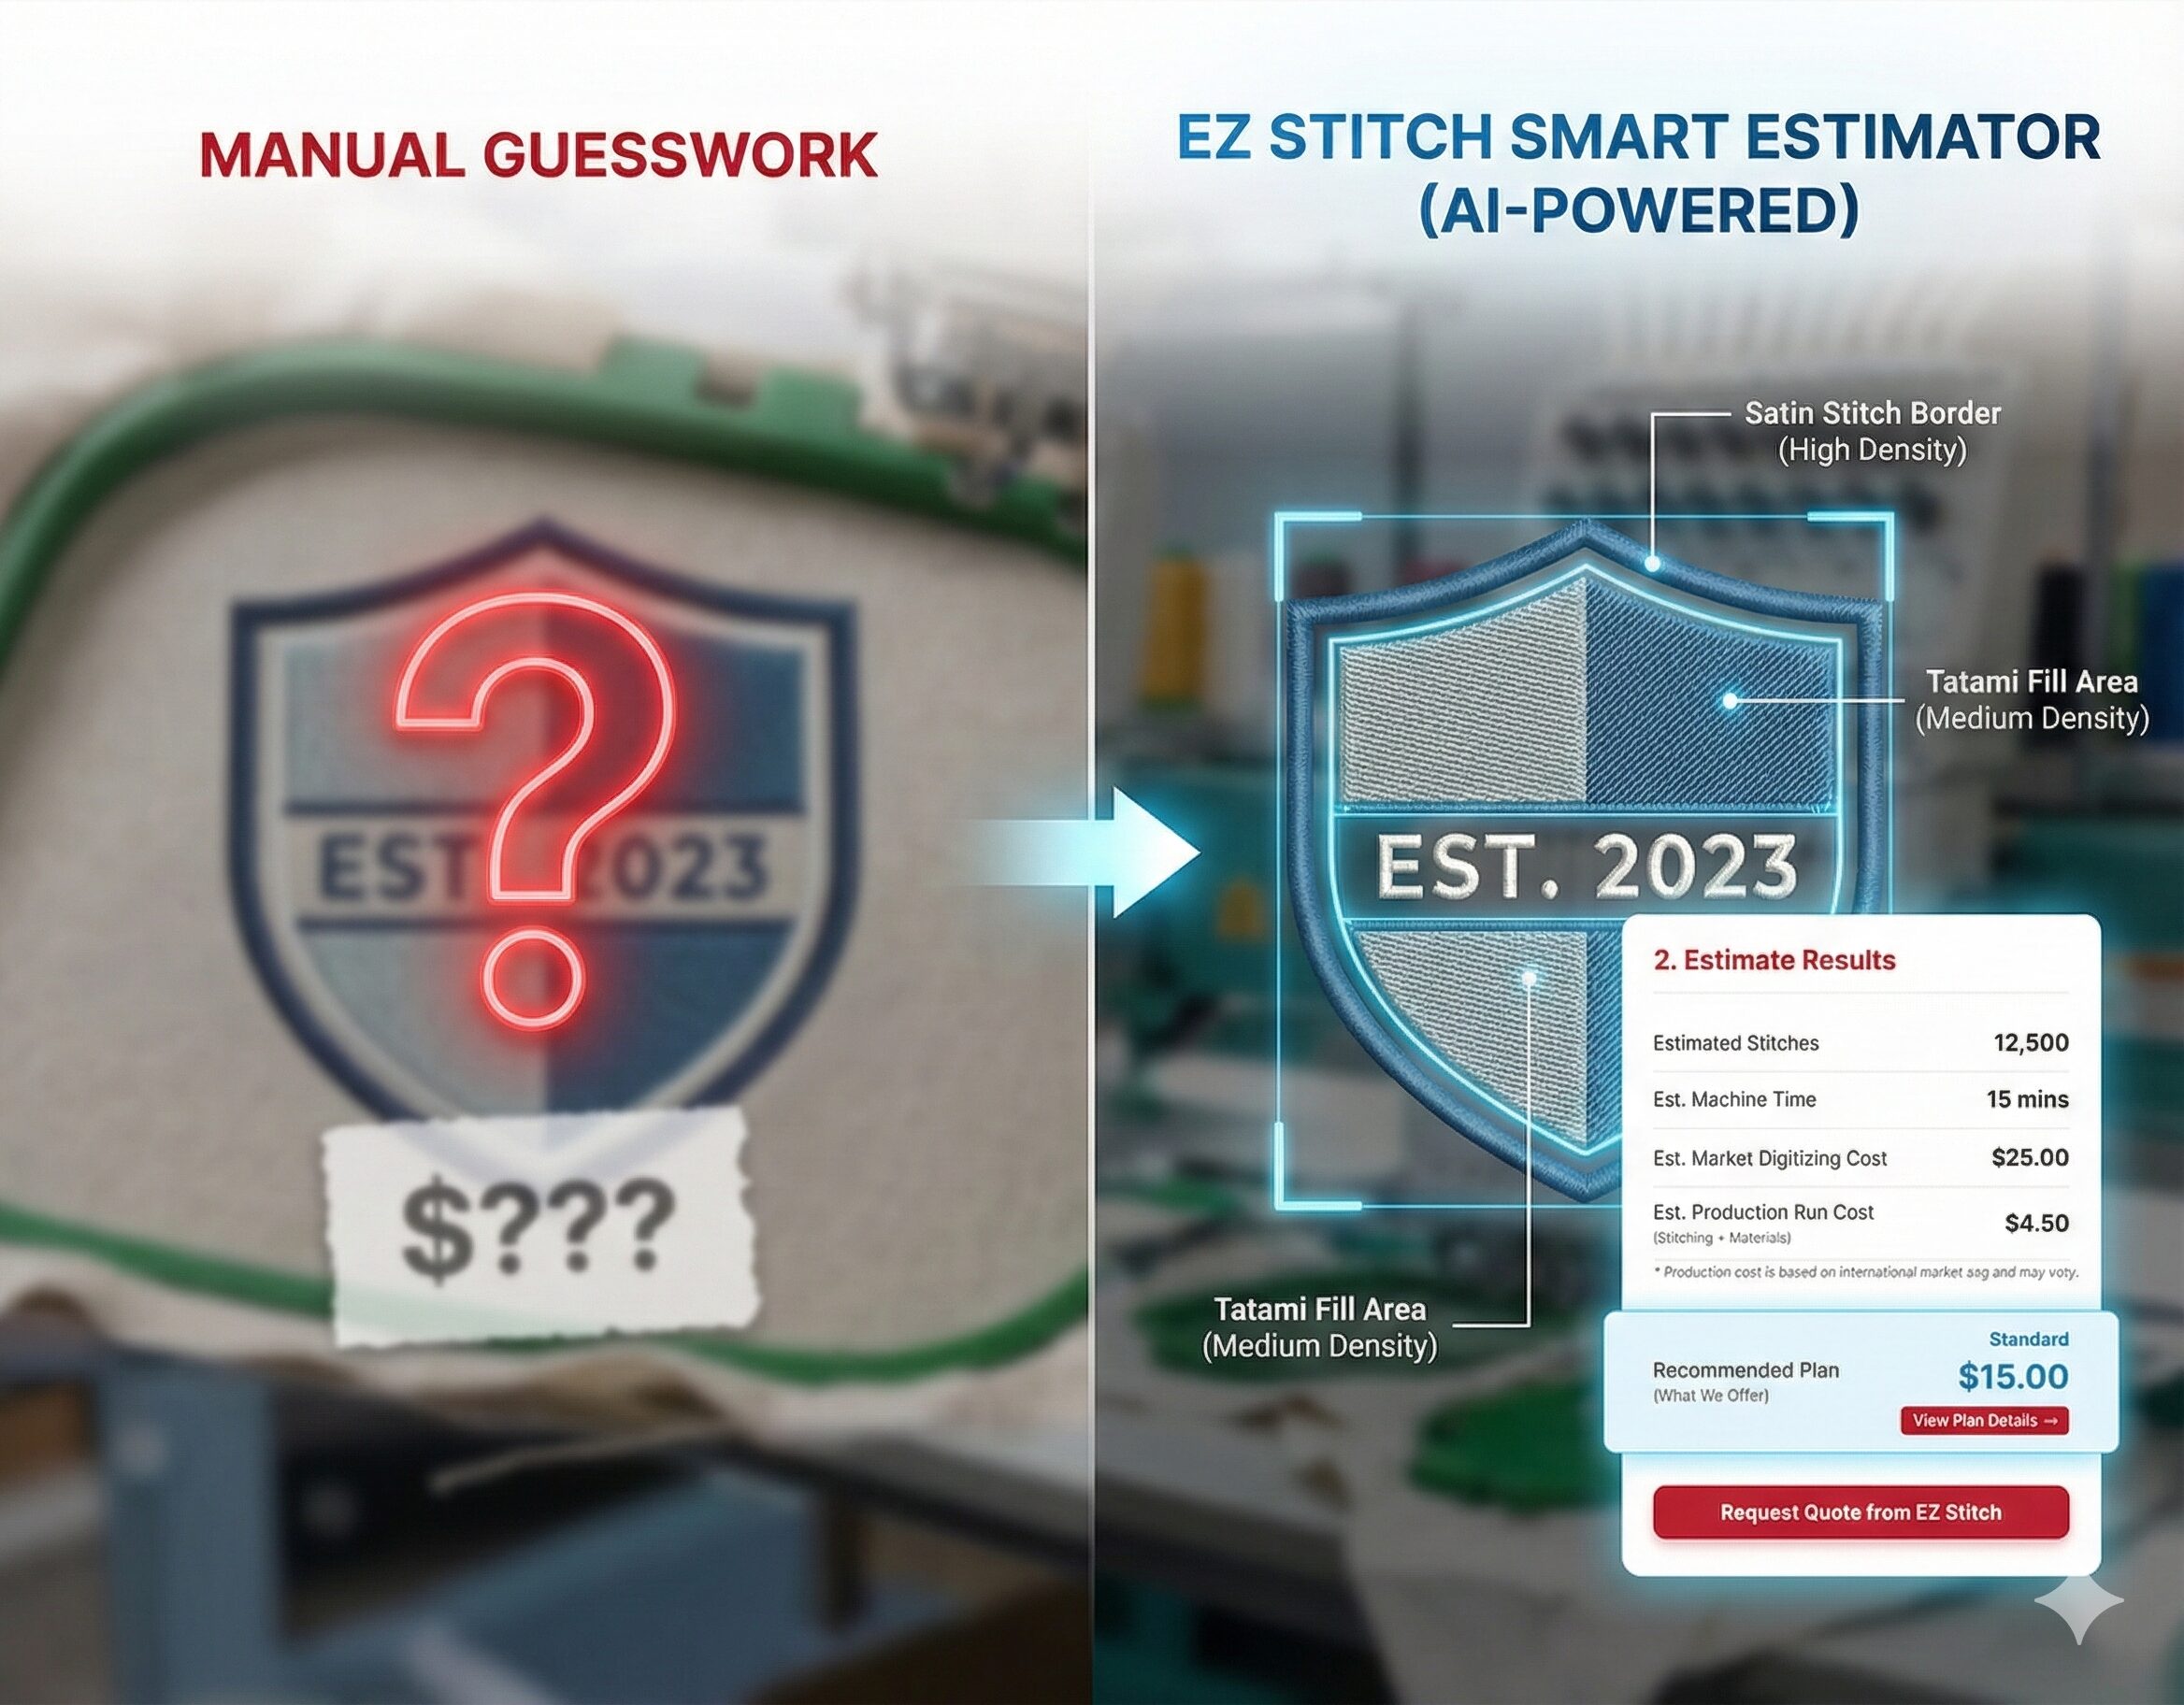
5. How do I price my embroidery services?
Consider stitch count, design complexity, material cost, and production time. Many professionals charge per 1,000 stitches.
6. Is digitizing the same as printing?
No — digitizing creates a stitch file for embroidery, while printing applies ink to a surface. However, both can be offered in a small printing business for variety.

