
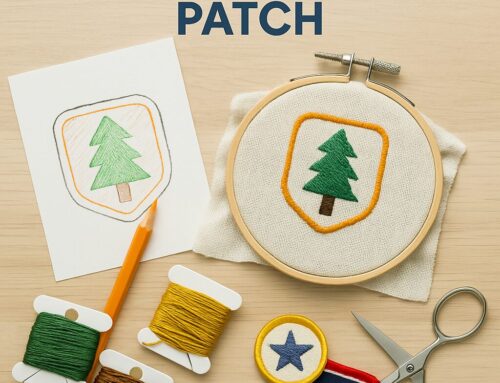
Introduction: From Memories to Stitches
Embroidery meets innovation when your favorite photos become lasting embroidered keepsakes. Whether you’re a hobbyist, custom apparel creator, or craft lover, learning how to digitize a picture for embroidery unlocks a new world of creativity. This guide will show you exactly how to take a digital photo and transform it into a stitched design using modern embroidery digitizing tools.
What Does It Mean to Digitize a Picture for Embroidery?
Digitizing a picture for embroidery means converting a digital image into a file your embroidery machine can read and stitch. It’s not just about translating pixels into threads—it’s an artistic process of recreating visual details with stitch types, thread colors, and textures.
Why It Matters:
It allows you to create custom gifts and personal designs.
It’s perfect for capturing portraits, pets, or logos in a unique way.
It blends old-school embroidery artistry with modern technology.
High-quality, high-contrast images with clear subjects tend to produce the best results. Let’s walk through what you’ll need to get started.
Tools and Materials You’ll Need
Essential Equipment:
Embroidery Machine: A reliable, computerized machine that supports different file types and fabric handling.
Digitizing Software: Choose a user-friendly embroidery digitizing software that supports photo conversion (e.g., Hatch, Wilcom, or free options like Ink/Stitch).
Computer or Laptop: Make sure your system can handle the software’s requirements.
Scanner or Camera: If your photo is physical, scan it in high resolution or take a well-lit digital image.
Materials Checklist:
Fabric: Cotton, canvas, or linen works well for photo embroidery.
Embroidery Threads: Go for high-quality polyester or rayon threads in colors close to your image.
Stabilizer: Prevents fabric shifting and puckering during stitching.
Embroidery Hoops: Keeps your fabric tightly in place.
USB or Transfer Cable: To upload the digitized file to your machine.
Needles, Scissors & Tape: The usual embroidery toolkit.
Getting Your Photo Ready for Digitizing
1. Choose the Right Photo
Resolution: Aim for high-quality, well-lit images.
Contrast: Select pictures with distinct light and dark areas.
Focus: Avoid cluttered backgrounds—clear subjects translate better into stitches.
2. Edit the Photo
Use free or paid image editors to:
Crop out distractions.
Enhance brightness and contrast.
Reduce the number of colors (especially for beginner projects).
Resize the image based on your desired embroidery size.
Pro Tip: Less is more. Simpler images with clean edges yield better embroidery results—especially if you’re just starting out.
Step-by-Step: How to Digitize a Picture for Embroidery
Step 1: Import Your Photo into the Digitizing Software
Open your software and upload your edited image.
Use auto-trace or manually outline the important elements.
Step 2: Assign Stitch Types
Use satin stitches for borders or smooth curves.
Use fill stitches for larger areas or solid shapes.
Tweak stitch direction and density to reflect shading and depth.
Step 3: Match Thread Colors
Let your software recommend threads based on image colors, or manually assign shades to match your collection.
Step 4: Preview & Fine-Tune
Zoom in on your digital preview.
Adjust areas where details seem too dense or unclear.
Watch for overlapping stitches, jump stitches, or thread breaks.
Step 5: Save & Export
Export the design in your machine’s supported format (e.g., DST, PES, JEF).
Transfer via USB or direct cable.
Time to Stitch! Embroidering Your Digitized Photo
Setup Tips:
Hoop your fabric tightly with the stabilizer.
Load the correct color threads in sequence.
Test the stitch design on scrap fabric first.
While Stitching:
Monitor thread changes and pause if needed.
Start at a slower machine speed for better precision.
Watch for tension issues or skipped stitches.
Troubleshooting Common Issues:
Loose Threads: Adjust tension settings.
Puckering Fabric: Add an extra stabilizer layer or reduce stitch density.
Thread Breaks: Use smoother, high-quality threads and check your needle.
Finishing & Caring for Embroidered Photos
Finishing Touches:
Carefully trim excess stabilizer.
Press your piece gently with a pressing cloth.
Mount, frame, or sew onto apparel or home decor items.
Care Instructions:
Hand wash gently or use a delicate machine cycle.
Avoid bleach or strong detergents.
Store away from direct sunlight to prevent fading.
Creative Uses:
Frame a memory for display.
Personalize tote bags, pillows, or apparel.
Create a thoughtful gift for loved ones.
Final Thoughts: Start Stitching Your Stories
Digitizing a photo for embroidery is more than a craft—it’s a way to preserve moments, express creativity, and personalize your designs. With the right software, tools, and a little patience, anyone can turn a favorite picture into embroidered art.
If you’re ready to bring your pictures to life through embroidery, or if you’d rather have the pros do it for you…
📩 Get in Touch with EZ Stitch Digitizing Today
Need help digitizing your image professionally? We’ve got you covered.
✅ High-quality embroidery digitizing
✅ Fast turnaround
✅ Trusted by crafters, brands, and small businesses
📧 Email us at info@ezstitchdigitizing.com
📘 Message us on Facebook: EZ Stitch Digitizing