Silk screening (also known as screen printing) is a fun and rewarding way to transfer your artwork onto T-shirts, fabric, paper, or other surfaces. Whether you’re a crafter, hobbyist, or a small business owner, learning how to silk screen can open up endless creative possibilities.
In this guide, we’ll walk through the process from start to finish with clear, easy-to-follow steps.
Supplies You’ll Need
Before you begin, gather these essentials:
A clean silk screen
Photo emulsion
Transparency film with your printed design
Squeegee
Screen printing ink
Tape (clear packing tape works best)
Washout sink or hose
Step 1: Coat the Screen with Emulsion
Apply a thin, even coat of photo-sensitive emulsion to your clean screen. This step should be done in a dimly lit area to prevent premature exposure. Once coated, set the screen aside to dry in a dark space.
Step 2: Expose (Burn) the Screen
Next, place your printed transparency onto the outside of the screen with the design facing down. Secure it with clear tape. Expose the screen to direct light or use an exposure unit until the emulsion around the design hardens.
Step 3: Rinse the Screen
After exposure, gently rinse the screen with water. The areas where your design was printed will wash away, leaving open mesh that allows ink to pass through. Let the screen dry completely before moving to the next step.
Step 4: Tape and Block Out
Use clear packing tape around the edges of the screen to prevent ink leaks. Carefully check for tiny pinholes (called “pinholing”) that may cause unwanted ink spots. Cover them using block-out, tape, or an emulsion pen.
Step 5: Set Up Your Screen
Attach your screen to the press or a stable surface. Line it up carefully using a T-square or ruler to ensure your design is centered and straight.
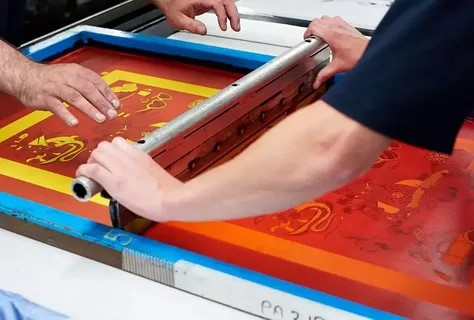
Step 6: Print Your Design
Place your textile (like a T-shirt) on the platen. Add a line of ink just above your design, then use your squeegee at a near-vertical angle to pull ink across the screen. Start with a test print to check alignment and ink flow before moving on to your final project.
Step 7: Cure the Ink
Once printed, the ink needs to be cured to set permanently. Depending on the ink type:
Plastisol ink: Heat cure for about 30 seconds at 320°F (160°C).
Water-based ink: Allow to air dry or use a heat press/dryer for faster results.
Always handle freshly printed textiles carefully, as the ink will still be wet until fully cured.
Final Thoughts
Learning how to silk screen may seem technical at first, but once you practice, the process becomes second nature. Whether you’re creating custom apparel, posters, or branding for your small business, silk screening offers professional-quality results at home.
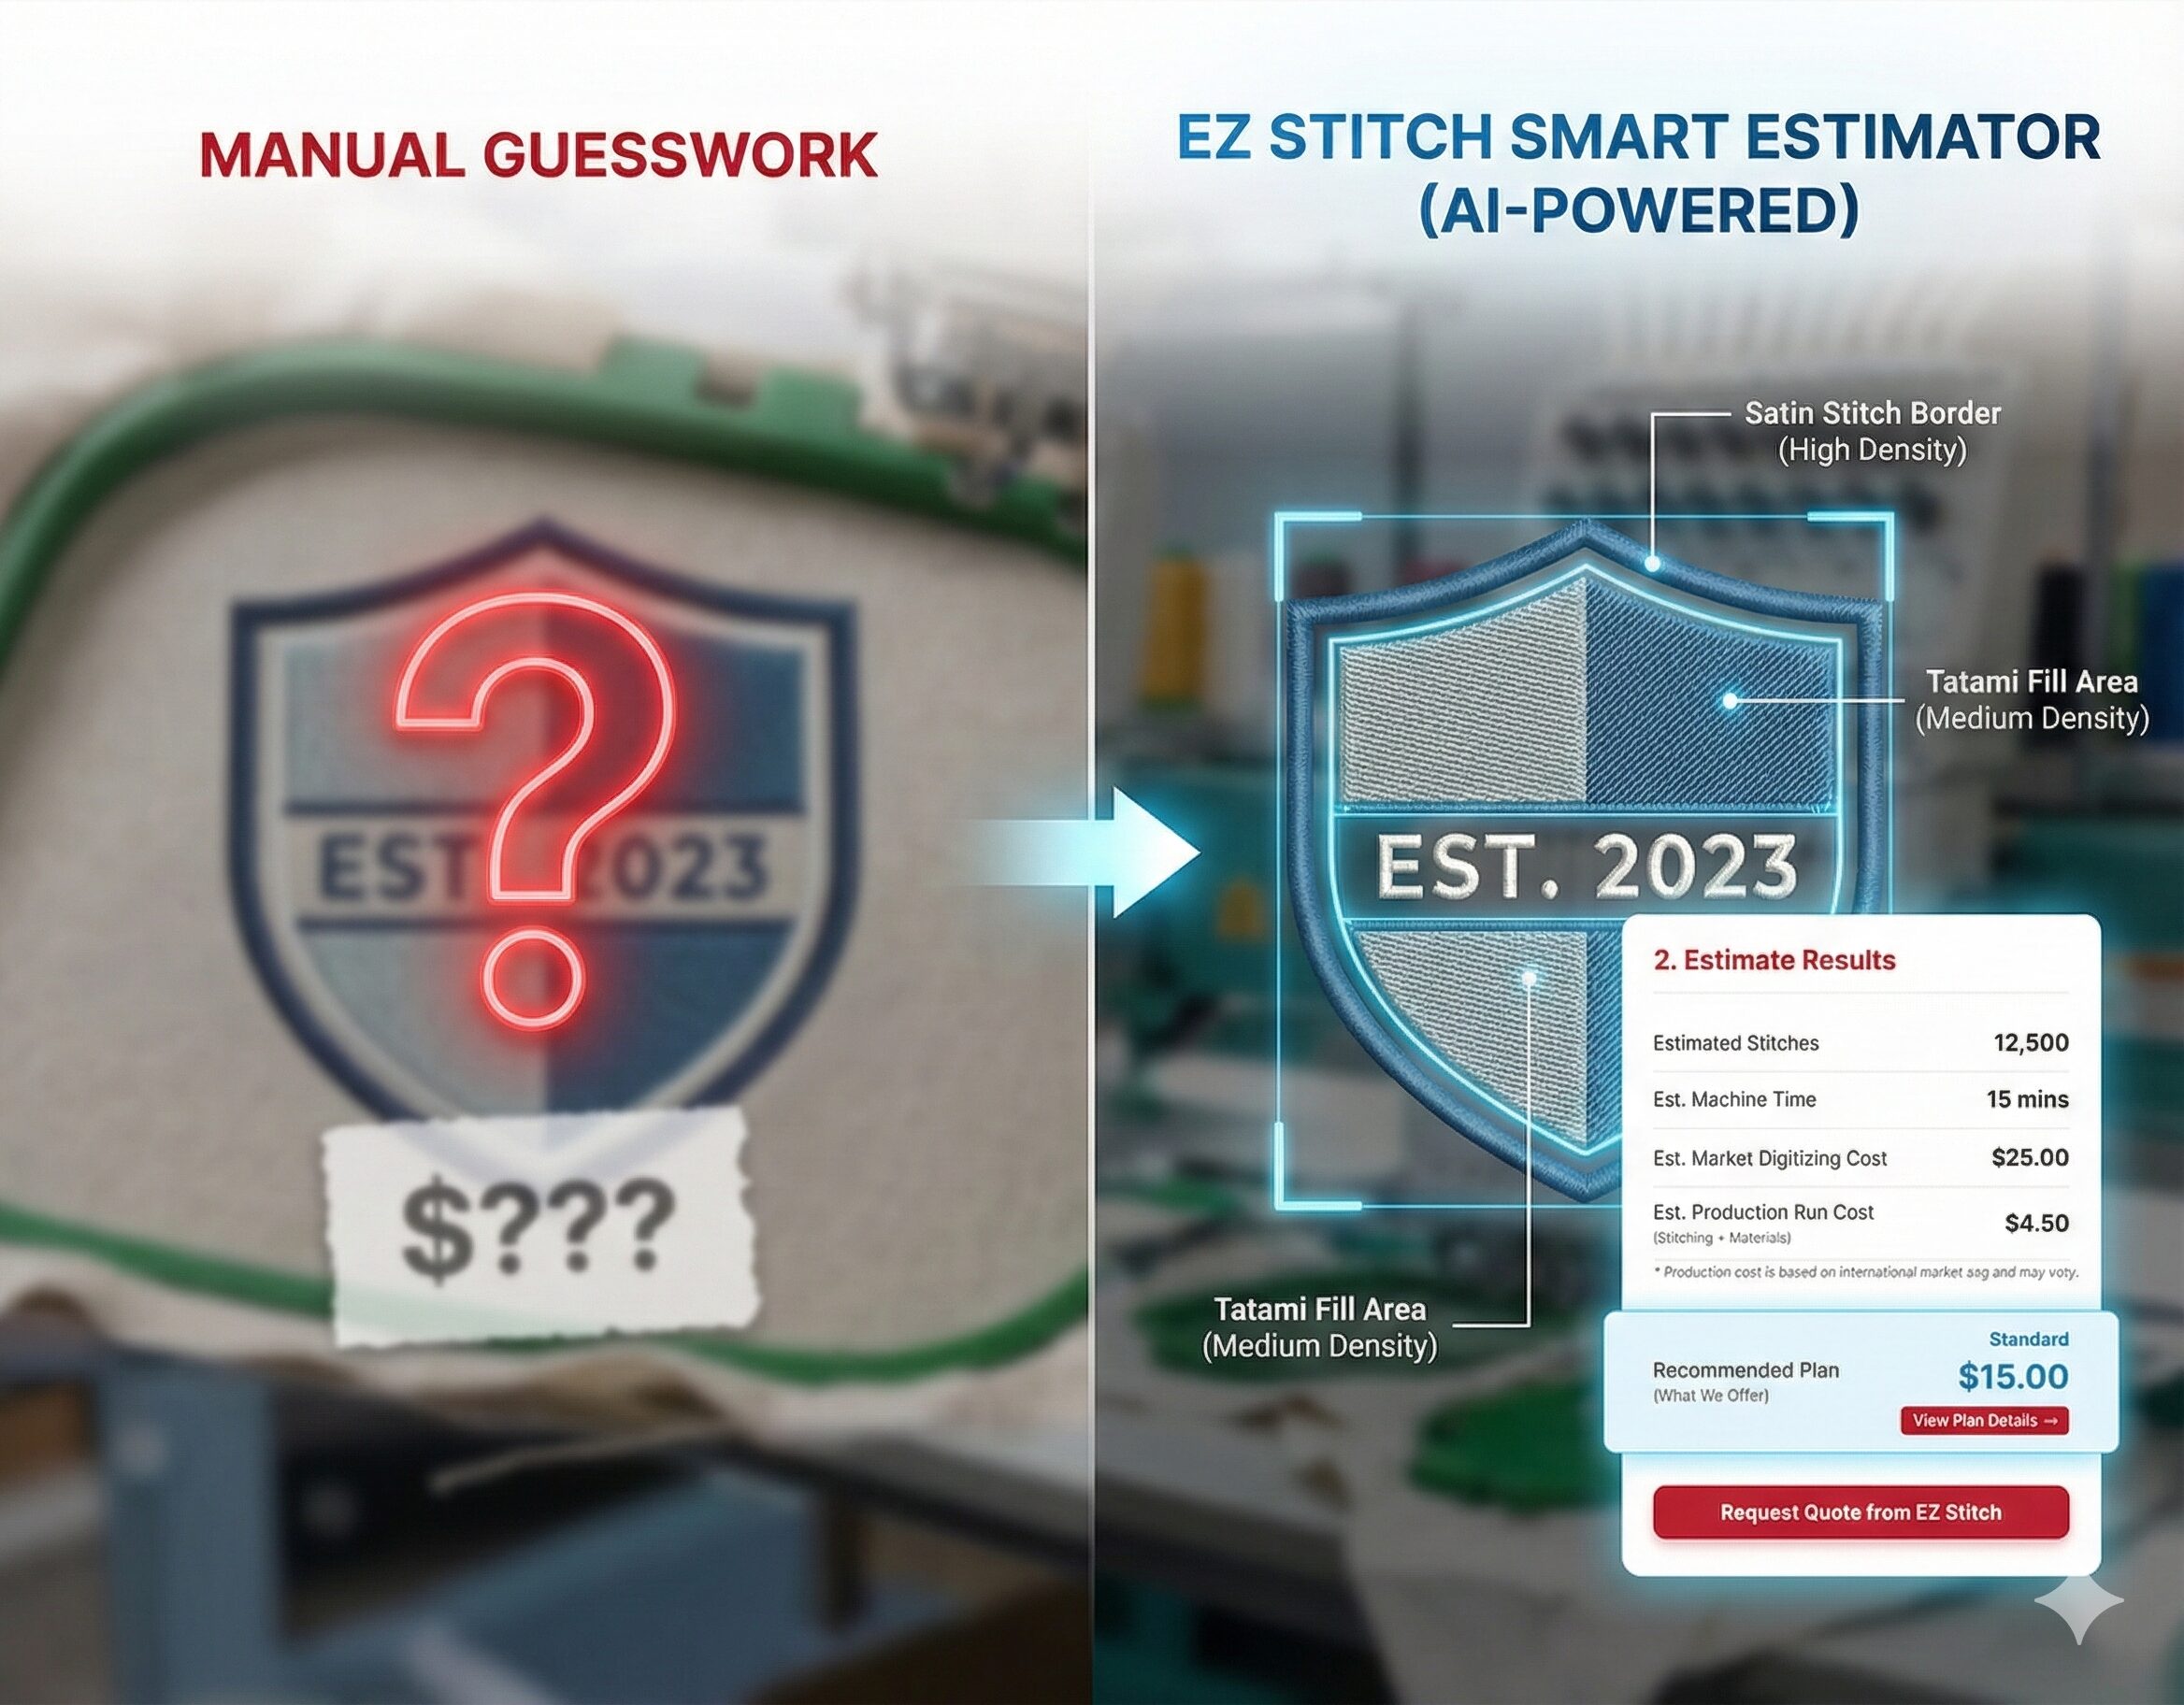
👉 Want help turning your designs into embroidery or vector-ready artwork? Contact us today at info@ezstitchdigitizing.com or message us on Facebook.
Frequently Asked Questions
1. How long should I expose the screen to light?
Exposure times vary based on your light source and emulsion. Typically, it ranges from 2–10 minutes with an exposure unit or 20–30 minutes in direct sunlight.
2. Can I reuse a silk screen?
Yes. You can remove the emulsion using a stencil remover and reclaim the screen for new designs. Proper cleaning and storage extend the screen’s lifespan.
3. What type of fabric works best for silk screening?
Cotton and cotton blends are ideal. Smooth, flat fabrics allow ink to transfer cleanly, while textured fabrics may require more ink or special techniques.
4. How many prints can I get from one screen?
With proper care, a single prepared screen can produce hundreds of prints before breaking down or losing detail.
5. Do I need special ink for dark fabrics?
Yes. Opaque or plastisol inks are recommended for dark garments since they provide better coverage and visibility.
6. Can I silk screen without professional equipment?
Absolutely. Many hobbyists build simple setups using a screen, frame, and bright light source. While a press is helpful, it’s not mandatory for small projects.

